Did I Save Half My Income in 2017?

Budget to Save Half Your Income

Last year I was featured in a Grow by Acorns article that highlighted millennials saving half their income. Over the course of 2017, I created and (mostly) stuck to my monthly budget. There were times that I would overspend if I went on vacations or had to replenish my emergency fund. But at the end of the year, I hadn’t saved as much as I had hoped. If I’m being honest, I didn’t save exactly half. Don’t get me wrong, I was very close (40%) but didn’t quite reach that 50% mark. That was a disappointing realization, here I am preaching about saving half your income, and I didn’t quite do it myself.

As with anything, saving money takes time and practice. We don’t always hit a bullseye with the first dart. When we stop, take a breath, and reflect, that’s when we start to grow. This year in an effort to grow, I’m creating and sticking to not just one budget…I’m holding myself accountable to three budgets.

1. My Monthly Budget

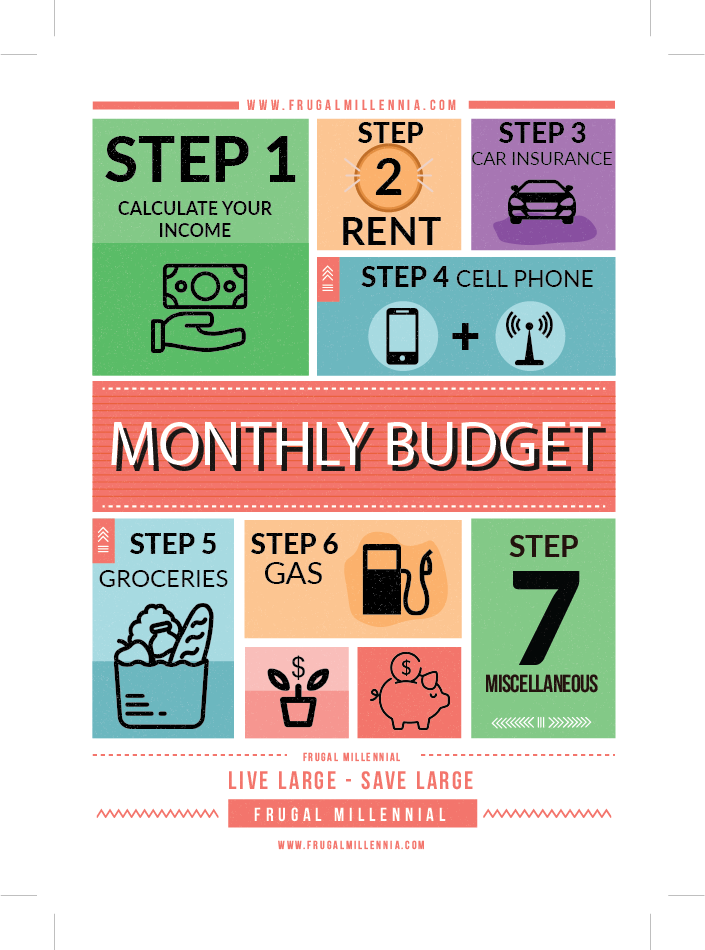
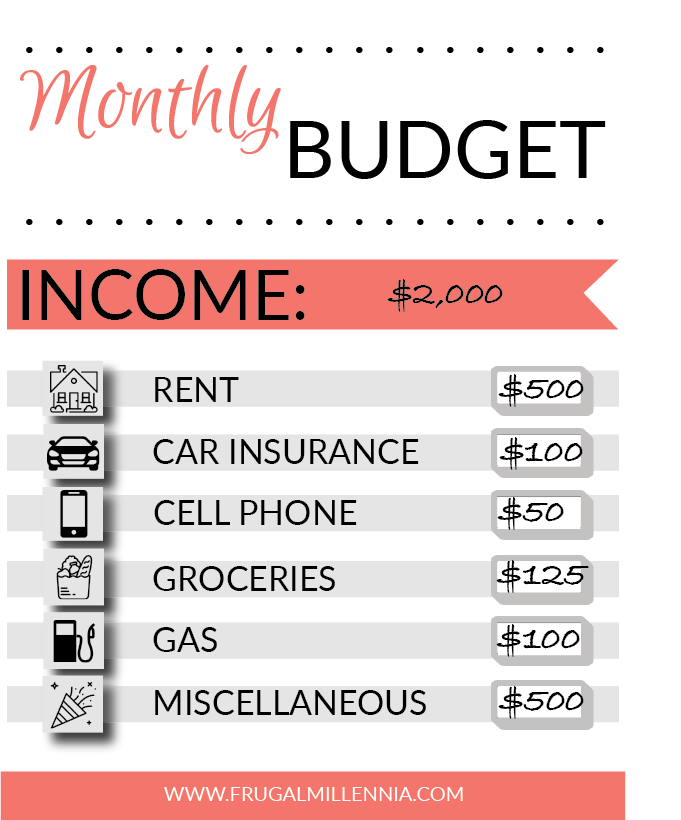
A budget is a written plan for your money. As Dave Ramsey says, “A budget is telling your money where to go instead of wondering where it went.”  In order to succeed with money, you need to tell your money where to go every month, not the other way around. If you don’t spend your money intentionally, you aren’t going to be able to save half your income. I’ve talked extensively about how I create a monthly budget, check out my 7 category budget to see how I divvy up my monthly expenses.

This year, I am being more intentional about not going over my monthly budget. There were many months that I would spend a majority of my miscellaneous money within the first two weeks of the month. That made for some tough choices. Would I say no to all social events the second half of the month? Or, would I overspend by a few hundred dollars to make up the difference? I was stuck between a rock and a hard place.

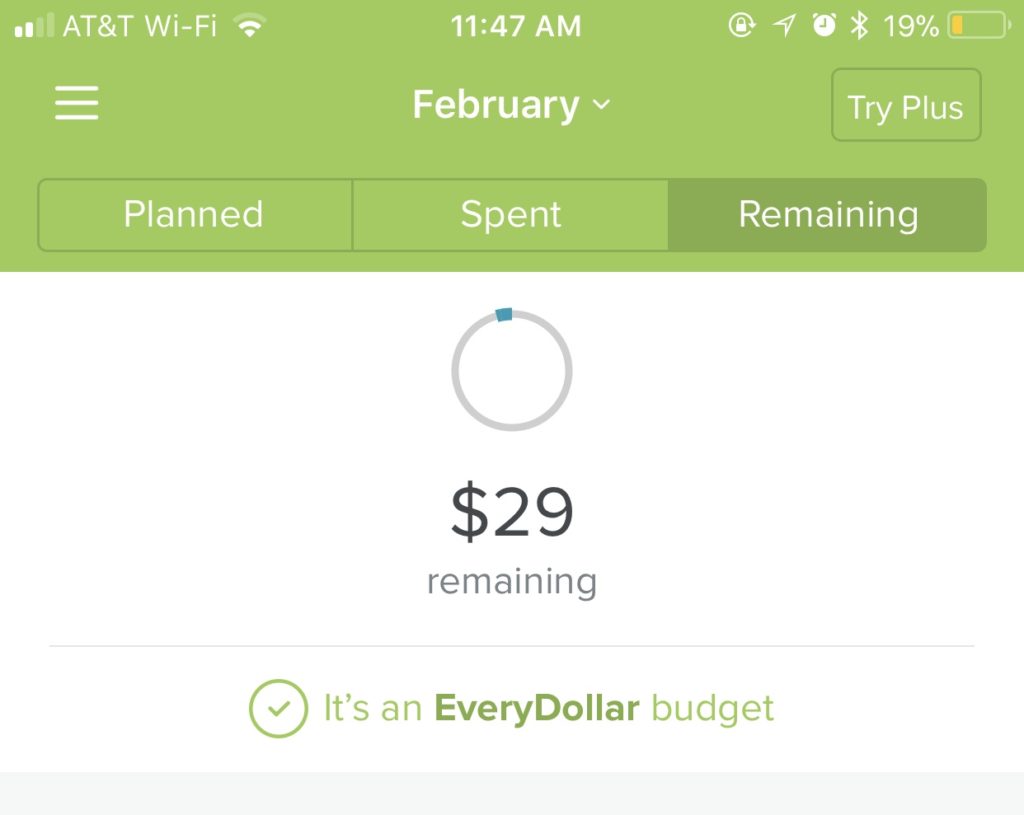
We’re almost 3 months (25%) into 2018 and so far I can say with complete confidence, that I have stuck with my monthly budget each month so far. Part of that is because I have been more diligent about planning out my spending to make my miscellaneous budget stretch throughout the entire month. The other part is because I have created and utilized new budget categories. (See below)

My Monthly Budget

2. Travel Budget

One thing that I’ve learned over the years is that life is all about balance. A big part of saving money is getting comfortable saying no. Over the past 4 years, I’ve said no to a lot of things. I’ve missed brunches, nights out with friends, and even trips with friends because I was so focused on getting out of debt and saving for my future. Last year I realized I needed to start saying yes. I was turning 25 and had spent most of my time in my 20s saying no. I didn’t want to look back on this decade and think, “man, I wish I had just lived a little.” Thus, the idea of the “year of fun” was born. So, I decided I was going to try and find a better balance between saving money and having fun.

Boy did I knock this goal out of the park–2017 was definitely a year to remember. I went to Cancun to swim with whale sharks, caught a 7-foot fish deep sea fishing, met Major Lazer in Las Vegas, and had the best 25th birthday surrounded by friends and family in San Diego. I can easily say, hands down that 2017 was a year of fun.Budget for Travel

My 2018 Travel Budget

As with everything, that fun came at a cost. While I wouldn’t trade any of my amazing vacations for anything, I do wish I would have budgeted for them accordingly. Because I was so used to saying no to trips with friend and family the thought to create an annual travel budget had never crossed my mind. This year, I’ve decided to set aside $3,000 in a travel budget. I can do anything I want with that money. I can spend it on day trips, or a luxury vacation on the other side of the world. Every time I spend money on a plane ticket or hotel room, I deduct it from my travel budget. While I’m giving myself a lot of flexibility here, one thing’s for sure: once the money is gone, it’s gone.

3. Additional Miscellaneous Budget

Another area that would often cause me to overspend was gifts and unexpected expenses. As I type this, I’m cringing that I didn’t think about it earlier, but things are going to happen. Last year, I had some pretty heavy car expenses due to freak accidents. On one occasion my car flooded–I got into my car after work one rainy Tuesday evening to find a 2-inch puddle of water on the floor of my car. After an initial freak out moment, I calmly called my insurance company and fortunately, I only had to pay a $500 deductible, but the total damage was over $3,000!

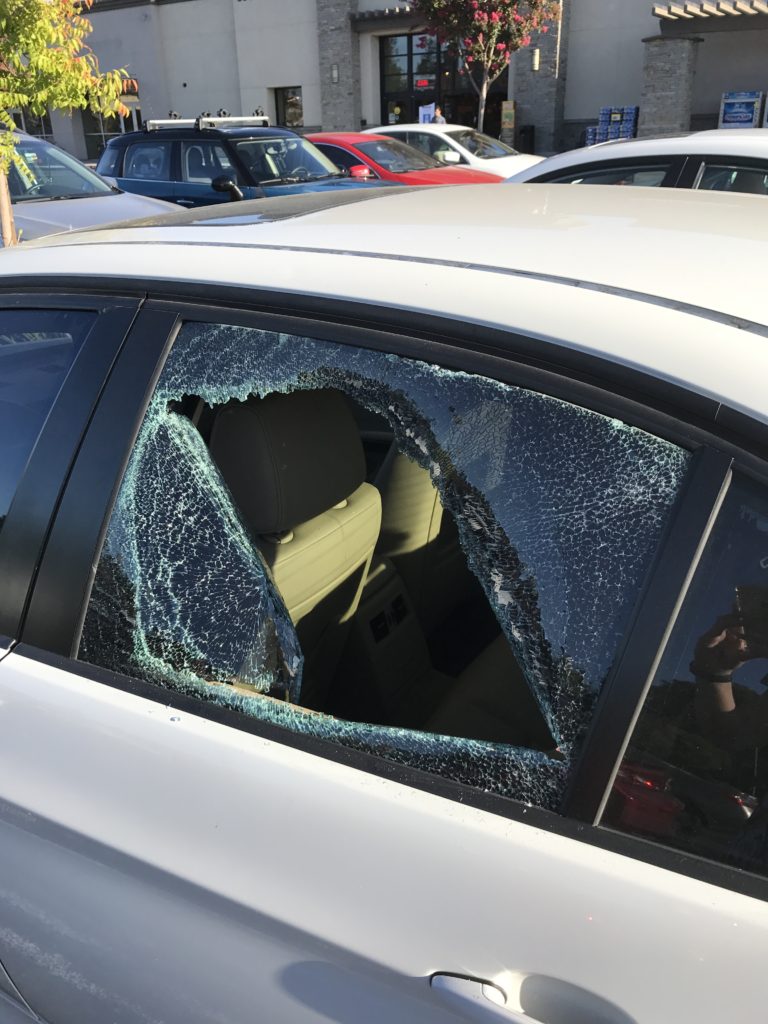
On another occasion, I was stopping by the grocery store on my way home from work and after I came out, I found my car window had been smashed and my new MacBook gone. This time, my car insurance wasn’t able to cover that incident and that was a very hard (and expensive) lesson to learn. Not to self: never leave anything valuable in the car, even if it is hidden.

Car Break In

Extra Padding

Budgeting is a lot like dieting. It takes discipline and hard work, especially in a world full of temptations. Last year, some of my budgeting setbacks would cause me to temporarily throw in the towel. After all, if I’m going to not keep my budget this month, why not just buy a new outfit while I’m at it. I’m learning to give myself more flexibility to make mistakes and not let them set me back.

Because I didn’t have a freak accident cushion built into my budget, I just had to swallow those expenses. This year, I’ve built an extra $1,500 cushion into my budget. That way, when things happen, like freak accidents, or if I happen to go over my budget one or two months out of the year, I have it covered. An added expense doesn’t need to trigger me to go off the deep end. Having extra padding in my budget that I can dip into in times of need, has given me peace of mind.

Budgeting for Success

I used to think budgeting was black and white. And in some respect I still do. But if there’s one thing 2017 taught me it’s that life is many different shades of gray. Unexpected things happen, that’s life. You can’t always control what is going to happen to you on any given day. Some days life gives you lemons and other days you just have to roll with the punches. By allowing myself more flexibility with my budget I am less stressed and am more on track to reach my goals this year.

Stay Frugal. Stay Fiesty.

Save Half of Your Income

Why I Save Half My Income

Ever since my story was posted on the Acorns blog I’ve been getting a lot of questions about how I save half my income. While it’s been overwhelming to answer each person individually, I wanted to provide as many answers as possible to all of your questions. That’s why I created my free ebook download as a guide to help you begin your journey. But I also wanted to give you more background on my personal journey of saving half. So, without further ado, I present you with my journey of saving half my income.

What prompted you to save half of your salary? Was there an “aha moment”?

I don’t think there was an “aha moment.” My journey started right after I had graduated college. I graduated with about $15,000 in student loans, which for me was overwhelming. A few months after graduating I secured my first job and started tackling my student loans. I wanted to pay off my loans as quickly as possible so I created a really tight budget and put all of my extra money towards paying off my loans. In those early days, I wasn’t necessarily trying to save half of my income, per say. It just kind of happened. I wanted to knock out my student loan debt as quickly as possible and with my extremely frugal budget, I was able to save half my income and eliminate my student loans within a year or graduating.

Once my student loans were paid off I decided to build an emergency fund and start saving for retirement. Each time I check off another item on my “Financial To-Do List” or get a promotion at work, I keep moving forward to save more and more.

What steps did you take to begin saving half? Did you start small and build the percentage? Cut back on expenses?

I’ve always tried to save as much as possible. The one thing that really made the difference for me, was not increasing my spending when my income increased. Over the past few years, I’ve worked hard to raise the ranks professionally and have actually doubled my income in the last few years. Instead of buying a new car, or going on weekly shopping sprees, I live (almost) as frugally as I did in those early years when I first graduated college.

Did you have to make sacrifices to achieve this goal?

I’ve had to turn down trips with friends, happy hours, and Sunday morning brunches. I give myself a little more wiggle room now but when I was first getting started, I lived ridiculously frugally. In fact, I still laugh at my 21-year-old self, I refused to pay for food and entertainment.

Free Entertainment

My first apartment was a studio apartment and I refused to splurge on internet and TV. I relied heavily on the public library–I would rent DVDs and books to keep myself entertained. Every Saturday morning I would wake up and head over to the public library. I would sit in the computer lab surrounded by kids and homeless people and use their free internet. Before I left I would check out a stack of books and DVDs so that I could stay entertained until the library opened back up on Monday.

Free Food

I also work in the tech industry which means fully stocked kitchens at work. So that first year I ate breakfast, lunch, and dinner at work. As boring as my life sounded a few years ago it really set me up for success. Not only was I saving a ton of money on entertainment and groceries, it really helped me grow in my career. I was spending long hours at work–and during my free time I was reading and learning new skills to help me advance my career.

What advice do you have for people who are starting where you were and would like to achieve something similar?

I think it’s important to understand why you want to save half of your income. For me, the peace of mind that comes with living frugally and saving a lot of my money is worth missing the occasional happy hour or brunch. Once you understand why you want to save half of your income, start tracking your expenses. I was spending a lot of money on mindless things that weren’t making me happy. In fact, to this day I can’t walk into a Target without filling up my entire shopping cart. Start with small changes and build from there.

What has been the best part of saving half?

The peace of mind and freedom it has given me. I’ve set myself up for success in a way that if I wanted to stop saving and just spend every penny of my paycheck, I could still retire with plenty of money. I also know that if something terrible happened in my life, I would be able to recover financially. Saving half my income has reduced a lot of stress.

How is life different now that your savings rate is so high?

I mentioned that saving half of my income has reduced my stress which has been the biggest benefit. A few months ago I was laid off from my job and didn’t stress about it. I knew that I had developed the frugal habits and emergency fund to be okay until I was able to find another job I loved. I ended up being unemployed for about a month and a half and was able to enjoy my funemployment. I took the time to really work on my blog and YouTube channel to provide all of you with more content. As I’m sure you can imagine, I also spent a lot of time at the library soaking up as much knowledge as I could during my free time. A lot of people don’t have that luxury and immediately go into a panic when they lose their income. The peace of mind it has given me has been the greatest blessing.

What is your next financial goal?

Purchasing a condo. I live in Silicon Valley where the housing market is out of control. The average condo costs $500,000+ so it will take me a while to be able to afford one. But once I do, it will be a major financial accomplishment.

What would you say to someone who says that what you’ve accomplished is “impossible”?

I think we all prioritize what is important to us. For some people spending time with friends is a priority, for others traveling, for me, it’s being financially secure. That’s not to say I don’t love traveling and hanging out with my friends! But once you make saving a priority and really start to focus on it, you can save half of your income too! In today’s day and age, you can learn anything from the internet. There are plenty of blogs and YouTube videos with people sharing their tips for living frugally and saving money. Set a goal, arm yourself with the knowledge and tools to accomplish it, and don’t be surprised when you’re saving half of your income a year from now.

What are practical tips for someone looking to save 50% or more of their income?

  1. Create a budget. I would not have been able to accomplish my goal without creating a budget and tracking every single expense. I highly recommend creating a monthly budget and tracking it with an app like Mint or EveryDollar.
  2. Learn that it’s okay to say no. Your friends will understand if you can’t make it to this week’s girls dinner. Your boyfriend will understand if you would prefer to cook dinner instead of going out to eat. You probably don’t need that candy bar you picked up from the CVS checkout line. Know that it’s okay to say no to yourself and others.
  3. Get creative! Just because you’re budgeting and saving money doesn’t mean you have to live the most boring life, ever. Learn to cook, explore your city, or get outside and go for a hike. I promise you, the more creative (and budget-friendly) I’ve gotten when planning things to do with my friends and boyfriend, the more fun we’ve had.
www.frugalmillennia.com 5 Dollar Tree Finds Infographic

5 Things I Only Buy at Dollar Tree

As a frugal millennial, I would be doing you a disservice if I never posted about Dollar Tree. When I lived in Arizona and was working to pay off my student loans as quickly as possible, I relied heavily on the dollar store. Dollar Tree was my first stop when I needed to purchase anything. When you’re working on a tight budget, every extra dollar you can save is going to make a difference. Over the last few years, and many trips to the dollar store, I’ve developed a pretty good sense of what to buy and what to skip at the Dollar Tree.

What to Buy at Dollar Tree

www.frugalmillennia.com 5 Dollar Tree Finds Infographic


Birthday Cards

I think birthday cards are overrated. Most of the time people scan them quickly before ripping open their gift. Then, the card gets thrown away and boom! You just spent $3-$4 on a card that was barely read or appreciated. Having said that, my friends and family rarely receive birthday cards from me. When I do splurge for a card, I ALWAYS buy it from the dollar store.

At Dollar Tree, each greeting card costs $0.50. You can get 2 birthday cards for $1.00. What a steal! That is way more affordable than the $3-$4 you would spend at Walgreens or Target.

Shaving Cream and Razors

Stop spending $20 on a razor! It’s absurd how costly it can be to keep your body hair free. My local Dollar Tree has a 2 pack of 5-blade razors for, you guessed it, $1.00. That’s right, I spend $0.50 on a 5-blade razor. Now, it’s not a brand name razor, but it works just as well. The Dollar Tree is the number one place I purchase razors.

On that note, I also only buy shaving cream from the dollar store. To me, all shaving cream is created equal. I don’t need to splurge on a brand name shaving cream. A large can from the dollar store is a great addition to my daily routine.

Before you buy another razor, check out my post on how to make your razors last longer.

Cooking Utensils

My kitchen in Arizona was completely furnished thanks to Walmart and the Dollar Tree. I had affordable pots and pans from WalMart and dishes/cooking utensils from the Dollar Tree. The dollar store is going to become your favorite place to shop if you need kitchen utensils but have very little extra cash. I had multiple plates, cups, even silverware from the Dollar Tree. I bought whisks, spatulas, oven mitts, and ice cube trays from Dollar Tree. You’d be surprised how easy and affordable it is to furnish your kitchen from the dollar store.

Now, mind you, your kitchen won’t be featured in the next Pottery Barn magazine. But, if you’re just looking for functionality and not style, head over to the Dollar Tree the next time you need a plastic cutting board.

Holiday Decorations

If you love decorating your house (or desk at work) for each holiday, you need to check out your local Dollar Tree. The dollar store is my first stop when I need holiday decorations. They have a wide array of decorations for every (major and minor) holiday. There’s no need to drop $100 on holiday decorations that you’ll use for just a few weeks. Save your money and head to your local Dollar Tree. You can decorate your entire house for under $20.

Keep in mind, you’ll want to prepare in advance. Decorations at the dollar store are a holiday ahead. Which means you don’t want to shop for Valentine’s Day decorations on February 10th. By the time February hits, the dollar store is already selling Easter decorations. Catch my drift? Prepare in advance and you’ll score major deals on holiday decorations at Dollar Tree.

Picture Frames

There are two places I regularly buy picture frames: Goodwill and Dollar Tree. The dollar store is a great place if you’re looking for simple 4×6 or 8×10 picture frames. Most of their frames are either black plastic or wood. Which is great if you’re looking for simple designs. Decorating your house with pictures of loved ones doesn’t have to break the bank. By heading to your local Dollar Tree you can save a lot of money on picture frames.

Have you checked out your local dollar store lately? What are your go-to Dollar Tree items? Comment below, I want to hear!


Stop Overspending

Stop Overspending

Do you find yourself constantly overspending? Do you have a hard time sticking to your budget? A few months ago I had an epiphany. I realized there was a reason behind my overspending. I had certain spending triggers that were causing me to constantly overspend.

Check Yourself

I’m just going come right out and say it, check yourself before you wreck yourself. Yes, I did just reference an Ice Cube song. 🙈 But hear me out. There are a number of stores that I personally avoid just because I know I’m going to overspend. Every time I walk into a Target I don’t come out with just one thing. I come out with an entire cart of things. And just like that my budget is just blown. In one hour I can easily blow my entire spending budget for the week.

What Are Your Triggers?

I know that I can’t go to Target unless I’m ready to spend at least $100. Most of the time, I don’t want a one-hour target trip to ruin my entire weekly or monthly budget. I also know that if I’m waiting in a long line to check out at CVS, I’m going to be staring at the candy bars along the checkout aisle. Which means I’m likely going to want to grab one and put it in my cart.

After spending the last 25 years on Earth, I know that there are certain stores and items that cause me to overspend.

Resist Temptations

If you know that there are certain stores or things that causing you to overspend, just cut them out of your life. I actually haven’t been to a Target in 6 months because I know I’m going to overspend. I have #financialgoals that I want to accomplish and I’m not going to let a Target shopping trip get in the way of me and my goals.

Learn to Say No

I’ve also learned that it’s okay to say no. It doesn’t make you a bad person to say no. Saying no to yourself and others makes you responsible. I’ve learned to say no to myself at the checkout line. Although spending a dollar on a candy bar isn’t going to break my budget, it’s an unnecessary expense that isn’t going to lead me towards my #financialgoals.

Spending my weekly shopping allowance on an hour-long Target trip isn’t going to make me happy long-term, either. Like the candy bar, I’m going to feel happy and excited for a few hours after my Target shopping spree. But eventually, the guilt will start to sink in.

Now that I’ve learned to say no and cut out spending triggers, I feel a sense of freedom. I’m not tied down to spending money on things that don’t actually make me happy. Sticking within my budget has given me a newfound sense of contentment. Check out the video below to see how I’ve learned to check myself before I wreck myself.

Grocery Shopping

Grocery Shopping on a Budget

I hate to admit it, but I have a dirty little secret. I secretly love watching Extreme Couponers on TLC. The fact that people can load up entire grocery carts full of food and toiletries and pay next to nothing is crazy to me. How is this even legal? As I’m typing this it sounds as if those people are robbing the grocery stores. And while I get an adrenalin rush while watching the show, I know that I, myself, will never be an extreme couponer. I just don’t have the time or the cajones to dig through dumpsters. So where does that leave me? I could throw in the towel and just spend whatever on groceries. Or, I could use a few tips and tricks that I’ve learned over the years to save as much money as possible grocery shopping.

Step 1: Create a Grocery Budget

If you’re like me, you’re probably a single millennial working to live on a budget. Your grocery budget is going to look different from mine. I don’t have any dietary restrictions (other than the fact that I don’t like seafood). I’m not vegan, Gluten Free, or Paleo. Which means, everything in the grocery store is up for grabs. My grocery budget is $125-$150 per month which breaks down to about $31.25-$37.50 per week.

If you’re used to spending $50-$100 per week on groceries, trimming your budget is going to be a bit of a shock. But stick with me.

Step 2: Check the Ads

Now that you have your budget in place, you need to check the ads. So stop throwing away your junk mail! That weekly packet of flyers you get on Wednesdays is going to be key to saving you tons of money. If you go to the grocery store without a plan it is way too easy to overspend. By knowing what is on sale you can begin to search for recipes with those ingredients.

When you’re looking at the ad, stick with the front page. The front page is going to have the best deals of the week. Grocery stores try and lure you in with those front page deals. But if you’re a frugal millennial, you’ll know that if you try and stick to just those front page deals, you’re going to score major savings.

Step 3: Create a Weekly Meal Plan

Now that you know what ingredients are on sale, it’s time to create a weekly meal plan. I try and eat 80% of my meals at home, it saves a lot of money, and quite frankly, it’s better for my waistline. With that in mind, create a spreadsheet (or download and print the one I use here) and write down your meal plan. www.frugalmillennia.com Weekly Meal Plan

If you have no idea where to begin when it comes to meal planning, worry not! A few years ago when I was just starting meal planning I was completely overwhelmed. I didn’t know how to cook or grocery shop, but over the years I’ve practiced every week and have become pretty good. My favorite recipe website is called Budget Bytes. It has really great recipes that are easy to follow and they use ingredients that I (almost) always have on hand. If I see that chicken, spinach, and red bell peppers are on sale this week, I head over to Budget Bytes to see what recipes have those ingredients.

Channel Your Inner Julia Child

I highly recommend you avoid processed food as much as possible. Not only will your waistline thank you, but your wallet will too. I’m not going to lie, I love to splurge on an occasional prepackaged meal and treat, but I don’t focus my weekly meal plan around process foods. Processed foods are really marked up and you are paying for the convenience. Unless chips, cookies, or frozen pizza is on sale, I don’t buy it. When it is on sale, I allow myself to pick up a package or two and spread it out throughout the week.

If you want to see what I’m eating and how I grocery shop, check out my weekly meal plans.

Step 4: Create a Grocery Shopping List

Now that you know what you’re going to eat for the week, it’s time to go get those ingredients! First, take note of what you already have on hand. Americans waste more food than any other nation. So, let’s save the earth and your pocketbook and check to see what you already have hiding in your refrigerator. After seeing what you already have on hand, add the ingredients that you need to buy to your grocery shopping list.

I crate my shopping list on the notes app on my iPhone. That way, I’m always carrying it with me and never have to worry about forgetting it at home. I mean think about it, when was the last time you went anywhere without your phone? As I walk through the store I delete items off of my grocery shopping list as I put them in my cart.

Step 5: Go Grocery Shopping

It’s go time! I played sports growing up, in fact, I was involved in everything from soccer to basketball to volleyball to track and field. Sometimes my inner athlete comes out and it’s easier for me to think in terms of sports analogies. I like to think of everything before hitting the store as practice. Checking the ads, creating a weekly meal plan, and grocery list are all prepared for the big game, hitting the grocery store. Now that you are fully prepared, let’s head the field.

Resist Temptations

As with any game you play, you’re going to have to overcome obstacles in order to get the outcome you want. When you’re at the grocery store, you’re going to be tempted to purchase things other than what’s on your shopping list. Try to resist. The more items you put in your cart that aren’t on your list, the more likely you are to overspend.

While overspending a few dollars won’t totally kill your budget, it will add up. The way I look at it, the more I spend on groceries, the less I can spend on other things. You see, if I go over my grocery budget, I have to take it out of my miscellaneous budget. That means fewer girls nights out, brunches, and shopping sprees. When I put it in perspective, it’s not worth it to me to add extra goodies to my shopping cart.

Grocery Shopping in a Nutshell

If you’re new to budgeting and trimming your grocery budget, this can be a lot to take in. To be honest, I don’t do everything on this list in one day. I spread out the task over 2-3 days. That helps me feel less overwhelmed.

On Wednesdays, my favorite grocery store, Sprouts, publishes its weekly ad. I head over to the website to check out the deals. After sifting through the online ad, I start to develop my weekly meal plan.

On Saturdays, I head over to Sprouts with my grocery shopping list on my iPhone. I scoop up all of my groceries and put them in the refrigerator.

On Sundays, I meal prep and make most of my lunches and dinners for the week. If my meals are prepped throughout the week I’m less likely to fall into temptation after a long workday. I’m less likely to go out to lunch with coworkers. I’m also not tempted to stop by Chipotle after work because I’m too lazy to cook. If all I have to do is pop my Tupperware in the microwave, I have no reason to eat out.

Breaking up my meal prepping and grocery shopping tasks throughout the week keeps me on track and prevents me from feeling overwhelmed. Try it out, and see what works best for you. The more you practice, the better you will be–I promise!

My MoviePass Experience

My MoviePass Experience

A couple weeks ago I wrote a blog post on the Netflix of movie theaters, a company called MoviePass. If you haven’t heard of it you
need to jump on the bandwagon!

What is MoviePass?

Like I mentioned MoviePass is the Netflix of going to the actual movie theater. For $9.95 a month you can see unlimited movies in the movie theater. You can see one movie at the movie theater every 24 hours. So, for just under $10 bucks a month you can see up to 30 movies a month. That’s a crazy good deal! I don’t even think there are that many movies that come out every month. It’s a ridiculously cheap way to go to the movies if you live in an expensive area where going to the movies cost more than $10.

Ordering a MoviePass Card

Don’t worry, fellow frugal millennials, I actually take my own advice. I decided to try out MoviePass so that I could accurately tell you about my experience. About a month ago I went to the MoviePass website and applied for the card.  They actually give you a physical card, like a debit card. In fact, the card actually says Debit MasterCard on it, which I thought was strange. After reading the fine print, I did see that all of the funds on the card belong to MoviePass. So, at this point, you can’t use the card as a real debit card. You can only use it to pay for movies.

After waiting about 3 weeks for my card to arrive, I recently received it in the mail. The company said it would take about 3 weeks for the card to arrive and it arrived exactly 3 weeks after I had ordered it. So, although that seems like a very long time to wait for a card, in this day and age. MoviePass did deliver within the timeframe they had quoted me.

On a side note: they do charge you your first $9.95 when you place your order for the card.

My MoviePass Experience

A couple days ago I actually went to the movie theater to test out my new card and see how it worked.  I found a movie I wanted to see (Happy Death Day). I walked into the movie theater with my card. Told the cashier which movie I wanted to see, swiped my MoviePass card and it got declined! I was bummed, to say the least. I mean I haven’t even used the card ever, how could it have gotten declined? Luckily the cashier at AMC was super helpful and helped me figure out how to resolve the issue.

How to Use MoviePass

First, you need to add your card to the MoviePass app. Once you do that you can head to the movie theater. Make sure you choose a theater that accepts MoviePass. You can see approved theaters near you in the “Theaters” section of your app.

MoviePass Step 1: Choose your an approved movie theater


Step 2: Once you’re within 100 feet of the movie theater, select the movie and showtime you would like to see.

MoviePass Step 2: Once you're within 100 feet of the movie theater, select the movie and showtime you would like to see
MoviePass Step 2: Once you’re within 100 feet of the movie theater, select the movie and showtime you would like to see

Step 3: Check into the movie you are going to see before you swipe your card to pay for the movie.

MoviePass Step 3: Check into the movie you are going to see before you swipe your card to pay for the movie

Why My MoviePass Card Was Declined

I wasn’t aware that you had to check-in to the movie in order to use your card. I figured, as long as I had my card in hand, I would be able to swipe it to pay for the movie. Wrong! I’m sure those smart folks at MoviePass make you check-in to the movie so that you can’t just give your card to your friends.

The nice AMC cahier taught me how to check-in to the movie. I swiped my card again and it was approved! And with that, I was off to see Happy Death Day.

Is MoviePass Worth It?

I highly recommend my fellow frugal millennials try it out. For less than $10 a month it’s a really great way to see a movie. It’s an especially good deal for me because where I live movies cost 13 to 15 dollars each. As long as I go see one movie a month I am saving money by using MoviePass. Plus, the best benefit of it is that it’s month-to-month. Which means you don’t have to sign a contract–you can decide to cancel at any time. So if you are sick of seeing the movies you
can just cancel and start back up again the next month.

Check out the video below to hear more about my first MoviePass experience.


Frugal Millennial Budgeting Infographic

Millennial’s Guide to Budgeting

If you want to get ahead and accomplish your #financialgoals, you need a monthly budget. Most Millennials graduate college with a fancy college degree but no idea how to manage money. The first step to tackling your finances is to create a monthly budget. I get it, you hear the word budget and you want to run for the hills. Most people cringe when they hear that dreaded b-word. But just hear me out, budgeting doesn’t have to be boring, overwhelming, or confusing.

I’ve been studying budgeting for the last 5 years, I’ve read over 50 books on the subject (can you even believe there are that many books out there?!). And I think I have a pretty good idea of what all of the major financial experts have to say about budgeting. But in all of my research, I keep coming across the same issue. The way budgeting is presented is complicated! Most people suggest using percentages and ratios, lots of spending categories, and that gets overwhelming.

Worry not, my fellow frugal millennials! Over the past 5 years, I’ve learned a few things to take the drudgery out of budgeting. First things first, download and print your own budgeting worksheet.

Step 1: Calculate Your Income

Before you can even begin to think about how much you can spend, you need to figure out how much you make. This isn’t complicated. Since it’s 2017 I’m assuming your employer pays you via direct deposit. Log into your bank account and see how much your employer deposits into your account each pay period. Then, figure out how often your employer pays you. Are you paid weekly, monthly, bi-weekly, or bi-monthly?

Let’s say you take home $1,000 on the 15th and 30th every month. In total, you take home $2,000 every month. That was easy! Now that we know how much money you are bringing in each month, let’s figure out how much we should spend.

Step 2: Calculate Your Rent

For most of us Millennials, our rent is a fixed rate and you’ve probably signed a year-long lease. While most financial experts recommend spending 25%-33% of your take-home pay on rent, you’re probably already stuck in a lease for the next several months. So, while your rent should be somewhere between $500-$660 per month (using our $2,000/month take-home pay example), you may be spending more than that.

Step 2.1: Budgeting Utilities

If you’re lucky, your utilities may be included in the cost of your rent. This makes it easy for you to plan ahead and know exactly how much you’re spending each month. If you’re not as lucky, and you are responsible for your varying utility costs, you’re going to have to take a few extra steps.

Electric, Gas, Water & Sewage

Look at your electric, gas, water & sewage bills over the past year, this should be as easy as logging into your online account and looking at your payment history. Calculate your average monthly spend and put that into your budget. This cost shouldn’t vary too much from month to month, but know that depending on your consumption habits you may be a few dollars over or under each month.

In your budget worksheet, fill out how much you spend on rent, and if applicable, add that to your average utility spend per month. In our example, let’s say you pay $500 per month for your apartment and all of your utilities are included. Go you!

Step 3: Budget Your Car Insurance

If you drive a car you need car insurance. This isn’t just me going on a rant encouraging you to get insurance (side note: you also NEED health insurance to protect yourself from bankruptcy). Most state laws require you to have car insurance if you drive your car. If you’re pulled over by the police and don’t have car insurance you better bet you’re going to get slapped with a major ticket. Save yourself the ticket and headache and make sure you are insured.

Your car insurance should be a fixed monthly rate that you pay every month.

In your budget worksheet, fill out how much you spend on car insurance each month. For our example, let’s say you pay $100 per month on car insurance.

Step 4: Budget for Your Cell Phone

I’m going to go ahead and assume that we all have a cell phone, and most of us have fancy data plans to go with them. The most affordable way to use your cell phone is to stay on a family plan for as long as possible. With a family plan, the cost is much less than if you were to get your own individual plan. In fact, what you would pay on a family plan is often half of what you would pay on an individual plan.

Calculate what you pay for the actual phone (if you’re leasing the phone through your carrier). And calculate what you pay to use the phone every month. Add that up and put it on your budget worksheet. In our example, let’s say you pay $30 per month to lease your iPhone plus $20 per month to stay on your family’s cell phone plan.

Step 5: Budget for Groceries

Your grocery category is one category where you can really save a lot of money. Most people spend way too much on groceries that they end up throwing away. The key to saving money on groceries is to go into the store with a plan and stick to that plan! If you’re a single person, shopping for yourself, I recommend spending between $125-$150 per month on groceries. That breaks down to $31-$37 per week on groceries.

Check out my post on how I grocery shop on a budget for more details on how to slash your grocery bill. Then, fill out the grocery section of your budget worksheet.

Step 6: Budget for Gas

If you own a car, you probably need to fill it up with gas every once and a while. Calculating how much you spend on gas every month isn’t too hard. Figure out how often you fill up with gas, and what your average spend is. I fill my car up with gas every 2 weeks. Each time I spend around $40. I give myself a bit of a cushion and allow my gas budget to be $100 per month. That extra padding helps if I take a road trip or if gas prices end up skyrocketing–which they sometimes do in California!

Calculate your gas budget and add it to the gas portion of your budget worksheet.

Step 6.1: Budgeting Parking

If you have to pay for a monthly parking pass for your apartment complex or work you’ll need to add this into your budget. If you only pay for parking every once and a while when you go to events, you can include that expense in your “miscellaneous” category.

For our example, let’s say you also budget $100 per month on gas and don’t’ have to pay for a monthly parking pass.

Frugal Millennial Budgeting Infographic

Step 7: The Miscellaneous Category

The miscellaneous category of my budget is my favorite and soon it will be your new favorite, too! I put all of my other monthly expenses in my miscellaneous category. This includes going out to eat, getting my hair/nails done, buying clothes, toiletries, etc. Some financial experts will tell you that it’s better to break your miscellaneous category into smaller, more manageable categories. If that works better for you, then by all means breakup your miscellaneous category.

Keeping One General Miscellaneous Category

For me, keeping one large, general category has really helped me stay on track and spend less. When I first started budgeting regularly about 5 years ago I split my budget into many little categories. But I found that I was overwhelmed as to how much money I should put in each category. And what about expenses that occurred frequently but not every month, like getting my nails done or buying shampoo? Ultimately having so many categories caused me to spend way more than I do now and it took me a lot longer to create the budget at the beginning of each month.

And thus, the general Miscellaneous Category was created.

Budgeting for Miscellaneous

You can decide how much you want to spend on miscellaneous items every month. To give you a point of reference, I budget $500 per month in my Miscellaneous Category. I break that down into $100 weekly increments and give myself that extra $100 to splurge on a random shopping trip, day trip, or an afternoon at the salon.

For the most part, I try to save my $100 for the weekend. I know that by the time Friday night hits, I’m going to want to grab a drink with my friends, head to a movie, or grab a meal out. Realistically, $100 is enough for a few budget-friendly weekend activities or one extravagant experience.

There was a time when I was going out to lunch and happy hour during the week and found that I was spending my weekly miscellaneous budget during the work-week. By the time the weekend rolled around, I had no money left to spend. I was either really cranky from being a shut-in. Or, more often than not, I was spending $800 per month on miscellaneous items.

Decide how much you want to spend on miscellaneous items each month. Add that amount to your budget worksheet.

Tying Your Budget Together

Once you’ve determined how much you’re going to budget for each category, you need to start tracking your expenses. Tracking your expenses is going to be the key to your success. If you don’t’ track your expenses, how do you know how much you’re spending? You don’t. And odds are, you’re going to end up overspending.

There are 2 apps I like to use: Mint and EveryDollar. Personally, I use EveryDollar more than Mint. I’m just more accustomed to EveryDollar than I am to Mint. Both apps are equally as good.

www.frugalmillennia.com Budgeting Worksheet Filled Out Example

You’ll notice my budgeting method is pretty simple and straightforward. In a nutshell, I try and spend as little as possible so that I can save at least half of my income. In the example above, we end up spending $1,375 of our $2,000 take-home pay. That means we end up saving about 1/3 of our take-home pay or $625 every month. That is a great start! You could put that $625 to work, either to pay off debt or invest in retirement.

You’ll also notice, I didn’t add that $625 to a new category on the budget. There’s a reason for this: out of sight, out of mind. For me, if I see that amount printed on my budget, I know I would be tempted to spend it. Instead, I set up autopay to either pay off debt or invest in retirement. Trust me, if you forget it’s even there, you’ll end up saving a lot more.

Comment below with questions, and happy budgeting!

Frugal Happy Hour

Happy Hour on a Budget

Grab your girlfriends–do I have a great idea for you! If you love happy hour as much as I do, you need to keep reading! I love getting together with my girlfriends after work, splitting a bottle of wine and chatting over appetizers. What I don’t love is when the check comes at the end of the night and I realize how much I’ve spent on small plates and drinks.

Happy Hour at Home

Last night my boyfriend and I wanted to celebrate some good news but since it’s the end of the month, our budgets are pretty tight. Instead of spending $30 each on drinks and snacks, we decided to stay in and make our own happy hour. I knew we had some cheese and snack foods that we needed to use up before they went bad, so all I had to do was run to the store, grab a bottle of wine, and a few more snacks and we would be good to go!

Frugal Happy Hour

Keeping Happy Hour Frugal

I knew we already had a few ingredients on hand. So, before I even set foot in the store, I knew I had to take inventory of what we already had in the house before spending unnecessary money.

Food on Hand

Frozen Meatballs – I typically make a big batch and freeze leftovers

Colby Jack and Pepperjack Cheese

Dried Fruit and Nuts

Frozen French Baguette (for cheesy garlic bread)

Groceries to Buy

Crackers – $1.99

More Cheese (Can you ever have enough?!) – $2.99

Wine – $5.99

Putting It Together

After spending a total of $11.52 (with tax) I drove home and put it all together. I had fun trying to see how creative I could get with the ingredients we already hand. Plus, it was a fun game to see how little we could spend. Below you’ll see the quick cheese board I threw together for under $12! It’s not the greatest picture, but I had to snap it quick–we were hungry and ready to eat.

Frugal Happy Hour Cheese Board

Our Happy Hour in a Nutshell

We had a lot of fun spending time together, catching up, and of course, laughing. Not only did we save over $40 but we had a delicious, homemade happy hour. While it is fun getting dressed up and going out to a restaurant. It’s also fun to mix it up and do it yourself. Just because you’re working within a budget, doesn’t mean you can’t have fun. Get creative, DIY, and you can have an awesome happy hour experience at home.

Looking for other creative date night ideas? Check out my post on MoviePass, the Nextlix of movie theaters.

Extended Warranty

Skip the Extended Warranty

Extended Warranties in a Nutshell

You’re at the store, about to check out, when the cashier suddenly asks you if you want to add the extended warranty. You’re about to drop $800 on a new flatscreen TV and you have only a few seconds to decide if you want to dish out an extra $100 for an extended warranty. What do you do? If you’re like many Americans, you probably agree to the extra $100 in exchange for peace of mind.

An Extended Warranty Isn’t Worth the Money

Most people who purchase appliances or electronics are encouraged by store salespeople to buy the extended warranty. Why is that? Why are we encouraged to purchase extended warranties? Because extended warranties are an easy way for retailers to make an extra buck off of you.

Here’s the deal, an extended warranty is really just a form of insurance. It gives you peace of mind that on the off chance something does break, you’ll be covered. But the fact of the matter is, products today are made better than they have before.

Products Rarely Break Within the Warranty Window

If a product is defective and is going to break, it will likely break within the first few months that you purchase it. It is extremely rare for a product to break 2-3 years after you have purchased it.

Repairs Aren’t Very Expensive

According to a recent Consumer Reports study, if your product does break, repairs often don’t cost very much. In fact, according to Consumer Reports, repairs cost on average $16 more than the cost of the extended warranty.

Manufacturers May Be Willing to Work With You

In today’s day and age social media has a lot of power. Consumers have more power now than ever to voice their opinion and have it heard. Rather than face the wrath of a social media nightmare, many manufacturers are willing to work with consumers to resolve issues.

Feel Confident Without an Extended Warranty

Before you make a major appliance or electronic purchase, do your research. Make sure you know the pros and cons of the product you are going to buy. If you have done enough research, you should be confident in your buying decision. Ask your friends, family, and neighbors for recommendations then hit the internet. If you buy a quality product, you shouldn’t worry about it breaking.

If you’re looking for other ways to save money, check out my post on why I never pay full price at Gap. And, check out the Honey Google Chrome extension to make sure you’re getting the best deal online.

Spend less on razors

How to Spend Less on Razors

Have you ever stopped to think about how much money you’re spending on razor blades? I just read a statistic that Americans spend around $100 per year on razors. That may not seem like a lot of money but pair that with shaving gel, aftershave (for the gentlemen out there) and lotion, and you’re spending way more than you need to. Did you know that there are a few simple things you can do to lower the cost of shaving?

Why Do Razor Blades Go Dull?

Razor blades don’t dull because you’re using them too much. They dull because they begin to rust. The more they rust, the more they dull. When wet metal is exposed to air it begins to oxidize. That’s a fancy way of saying wet razors rust easily. Every time you wet your razor to shave, the blades begin to rust which weakens them and ultimately causes them to flake. Flakey, rusted razor blades lead to a rougher (uncomfortable) shave.

How to Prevent Razors From Rusting

The easy answer is to keep your razor blades dry. First, don’t keep your razor in the shower. Keeping your razor in the shower is throwing your hard earned money out the window. Keeping your razor in a warm, moist, humid environment is one of the worst things you can do. It severely shortens the lifespan of your razor. Instead, keep it out of the shower, in a dry location to prevent rusting.

Second, dry your razor after each use. After you get out of the shower dry your razor with a hair dryer or fan. Or, dip your razor in rubbing alcohol. Rubbing alcohol blasts away water molecules and dries blades quickly.

Drying your razor after each use will significantly prolong its use. You can use the same razor for months if you keep it dry. Not only will it last longer, it will also be more sanitary because there won’t be built up bacteria and rust from it sitting in moisture.

Where to Buy Cheap Razors

If you’re looking for a cheap place to buy razors, look online. Discount razor clubs are popping up all over the internet and can save you some serious cash! Dollar Shave Club is one of the most well-known discount razor clubs. Dollar Shave Club is a monthly (or bi-monthly) subscription to have razors sent directly to your door. No longer do you have to go out and buy razors every few weeks. For as little as $1 your first month, you can have a razor delivered directly to your door. Plus, you can sign up one month and cancel the next for any reason.

Another discount razor club is Dorco USA. Dorco is similar to Dollar Shave Club but some people find it cheaper in the long run. Dorco has an extensive line of men’s and women’s razors and if you want to try them out, click here to get 15% off your first order.

P.S. If you’re going to buy razors online, make sure to download the Honey Google Chrome Extension so that you can automatically get the best coupon codes applied to your order. I use Honey every time I purchase anything online. Not only do I save money with the best coupon code, but I also earn cashback on every order.